Lino tile design

Lino tile cut using a bench hook and tile cutter
(It was only after I'd finished the tile that I realised I'd tranferred the image on to it the right way round instead of in reverse)

First print - white cartridge paper
Even though the image is now in reverse I still think it works well and I actually find the perspective more pleasing this way round

Second and third prints on painted cartridge paper (thin wash of red acrylic)


Fourth and fifth prints on coloured sugar paper


The above samples were then ripped up and collaged on to separate sheets

And then playtime with photostudio......

Lino tile cut using a bench hook and tile cutter
(It was only after I'd finished the tile that I realised I'd tranferred the image on to it the right way round instead of in reverse)

First print - white cartridge paper
Even though the image is now in reverse I still think it works well and I actually find the perspective more pleasing this way round

Second and third prints on painted cartridge paper (thin wash of red acrylic)


Fourth and fifth prints on coloured sugar paper


The above samples were then ripped up and collaged on to separate sheets
 |
| Upside down - oops! |

And then playtime with photostudio......
 |
| Severly cropped and image skewed. Background highlighted with magic wand and filled with black |
 |
| Same again but didn't crop image as small; more black added at the top using fill and extra black added in the centre using airbrush |
 |
| Playing with the shape cuttting tool, lasso and frost effect |
 |
| Made old photo style, cropped and an exact copy stitched, image cropped again incorporating sections of both images. Parts darkened using magic wand and fill with opacity reduced and colour set to mimic sepia tones (Reminds me of deserts!) |
 |
| Scanned image of lino tile and colour gradient tool used with magic wand; airbrushing tool for yellow sections |
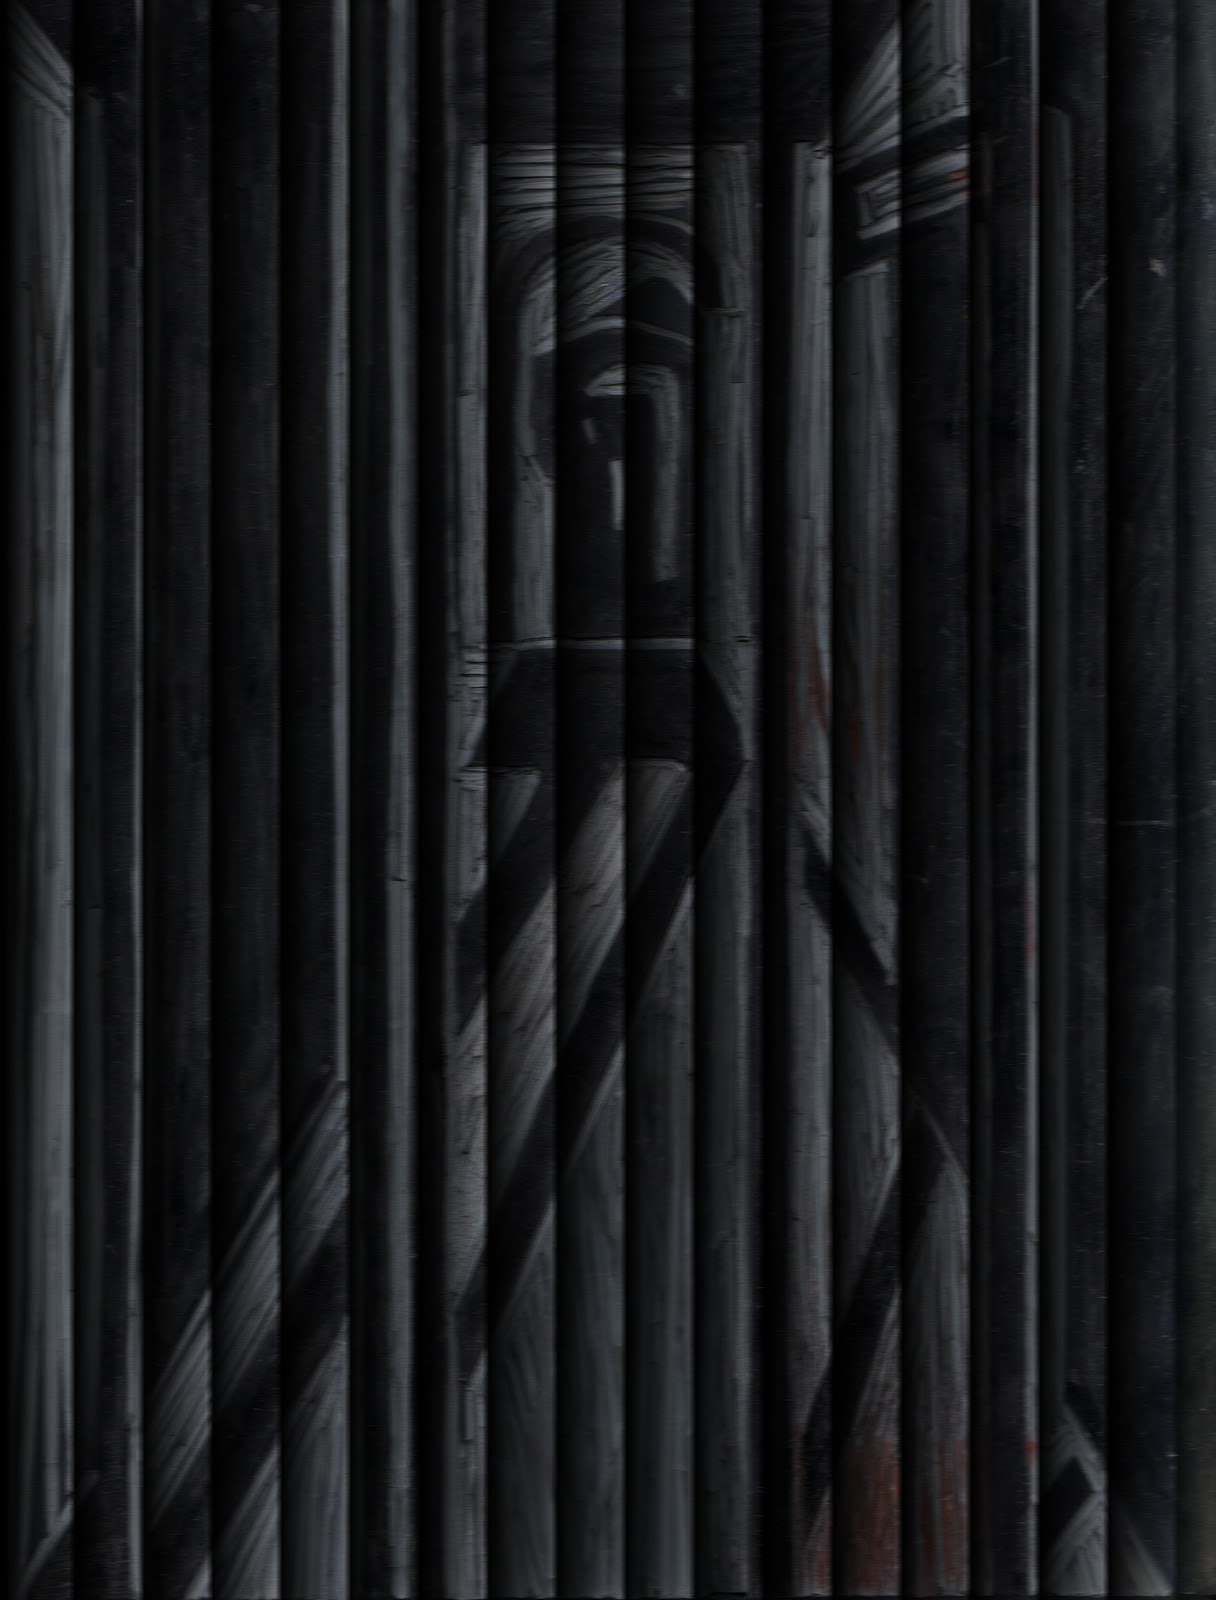 |
| Lino tile scan - blinds effect used |
 |
| And again but image copied, stitched and then cropped so the left side of the image is repeated on the right hand side |
 |
| Ripple tools used on copy of previous image. Magic wand used to highlight area which was then filled with red |
No comments:
Post a Comment